How to Move Software from Windows 10 to Windows 11?
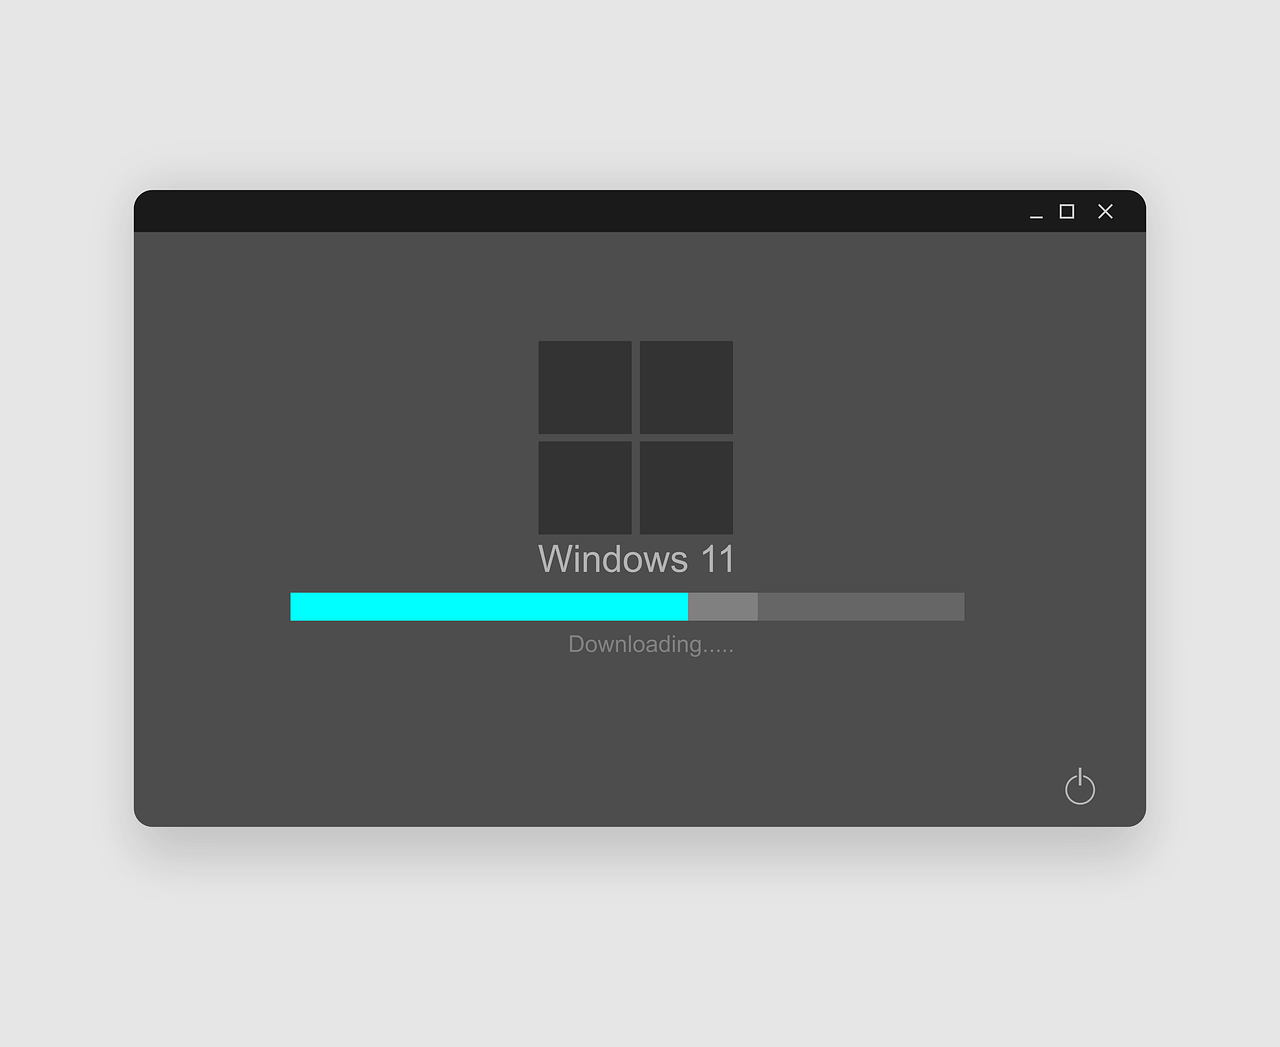
Windows 11 is the latest operating system upgrade available from Microsoft, and everyone is looking forward to migrating from their old Windows 10 to Windows 11.
Whether you're planning to buy a new PC with Windows 11 pre-installed on it, or you want to upgrade your current installation to Windows 11, you’ll have to risk losing all your configurations, user settings, and installed software. But you don’t necessarily have to do that!
FastMove is your credible partner that will help you to avoid the hassle of setting up your Windows 11 PC from scratch and installing all the software you use regularly again.
So, how can you move software using FastMove? There are a couple of options:
Online software migration from Windows 10 to Windows 11
Offline software migration from Windows 10 to Windows 11
Let’s have a look at each option.
Online Software Migration from Windows 10 to Windows 11
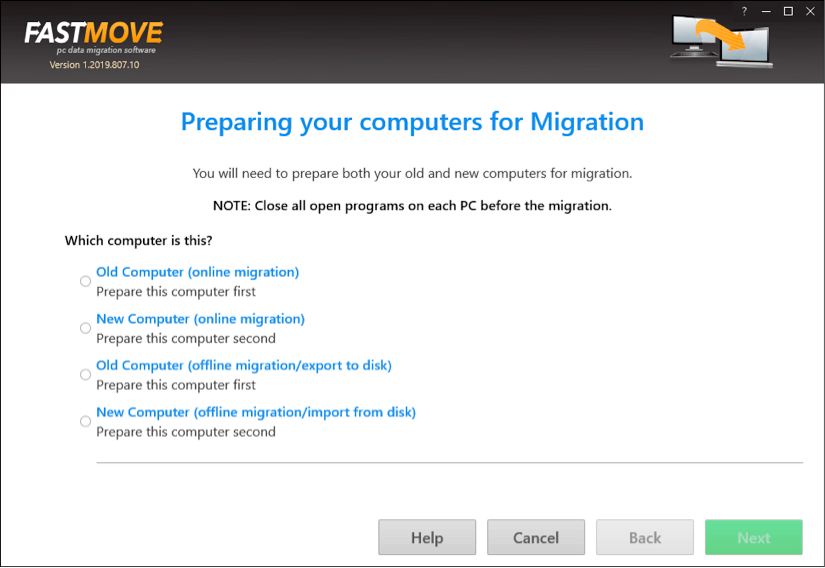
This option is best suited for transfers when you have to transfer data between two PCs connected to the same network. You need to have FastMove installed on both computers and make sure they are both connected to the same network. Next, follow the steps below to successfully migrate installed software to your new Windows 11 PC:
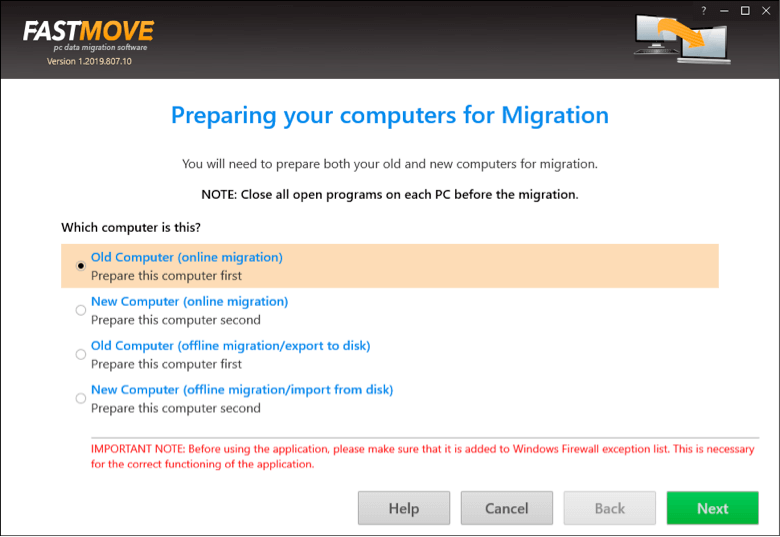
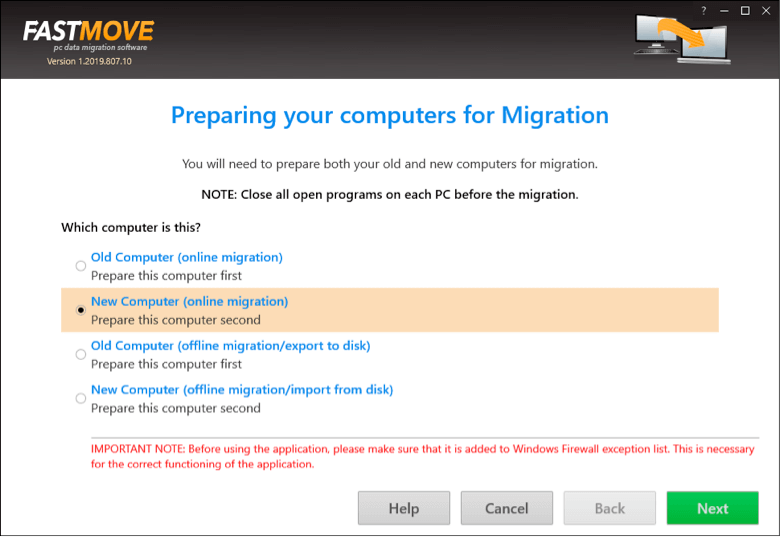
Select the “Old Computer (online migration)” option on the Windows 10 PC and hit “Next”.
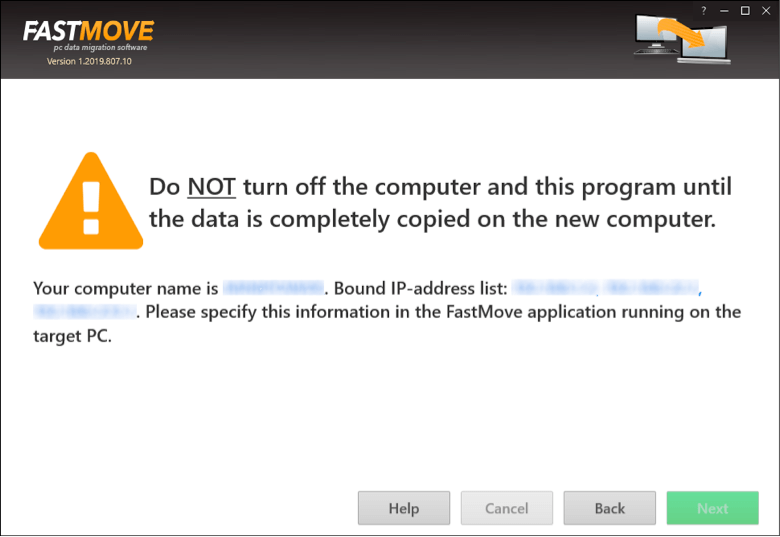
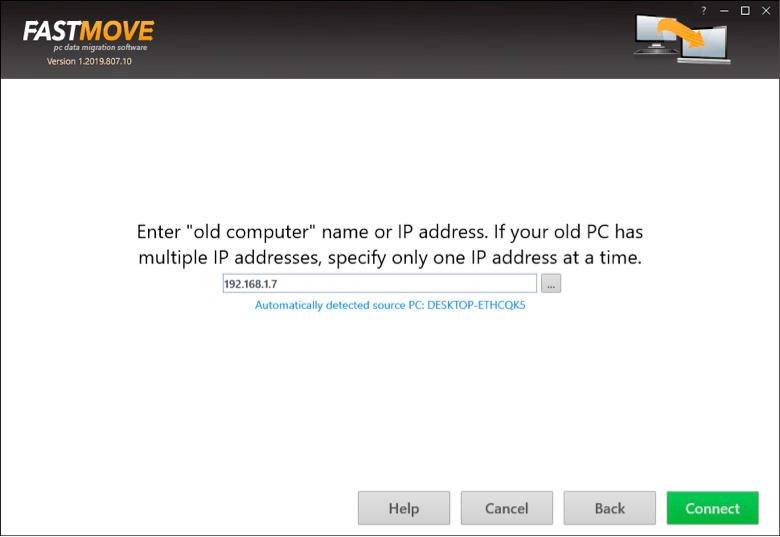
Note down the “computer name” and “bound IP address” of the source PC displayed on the next screen that appears.
Launch FastMove on the Windows 11 computer and select the option labeled “New Computer (online mode)” before you click “Next”.
FastMove will scan the local network automatically to detect your Windows 10 PC for transfer. Select the PC detected automatically or enter the name or IP address you noted in Step 2.
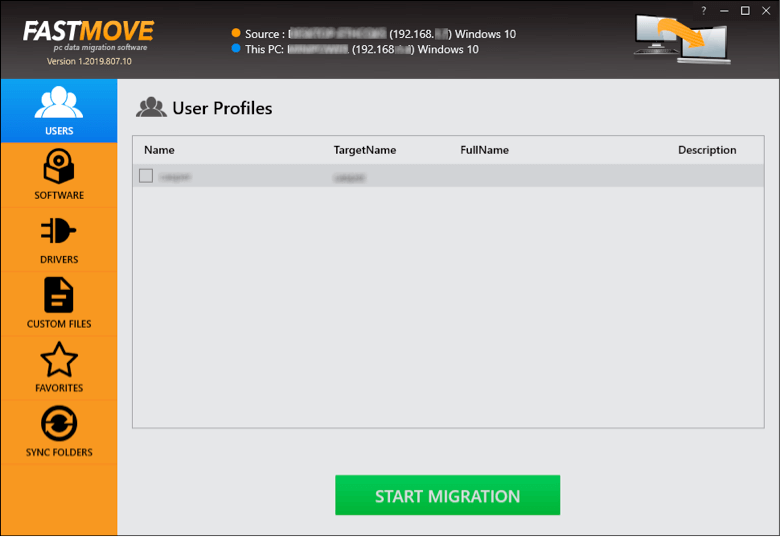
Click “Connect” and the migration interface will appear to allow you to start moving desired software installations from Windows 10 to Windows 11.
On the Software tab, select all the software that you want to move and click “Start Migration”.
That’s it! FastMove does the rest!
Offline Software Migration Using a Network Folder or an External Hard Drive
Offline software migration is the go-to choice when you don’t want to connect your Windows 10 and Windows 11 computers, or just can’t do that. To make the transfer possible in this case, you’ll need a shared folder on a local network or an external hard disk drive to first export the desired software installations from the Windows 10 PC and then import everything on Windows 11. Here’s how you can do this step by step:
Launch FastMove on your Windows 10 PC and select the option labeled “Old Computer (Offline Migration/Export to Disk)” before you click “Next”.
Select the destination folder for copying all your data on an external disk drive or a local network.
Click “Continue”.
Next, on the software tab, check all the boxes in front of the software installations you want to migrate.
Once done, click “Start Export” and wait until the process is finished.
Now, remove the drive from your Windows 10 PC and connect it to your new Windows 11 PC (If you want to install Windows 11 on the same PC, connect the drive after installing new Windows).
Launch Fast Move on your Windows 11 computer and choose “New Computer (Offline Migration/Import from Disk)” before clicking “Next”.
Browse to the folder containing all the data you want to move and click on “Continue”.
Check all the boxes and click “Start Import”.
Wait until the process is completed, and you’ll have all your software installations and configurations on the new Windows 11 PC.
FastMove is quick and reliable software to move Windows 10 software installations and configurations to your new Windows 11 laptop. Download it today and experience seamless data migration!